
WIP: London Underground Bank Station Interior
I've just completed the blockout for the Subway station interior that I will be completing in 2 months.

Reference Image for the scene
Below are images of the initial blockout in Unreal Engine 4.


This is all very rough and early, and only represents the groundwork for the final product.
WIP: London Underground 1992 Tube Stock Interior
I've been working on modeling on the exterior and interior of the London Underground 1992 Stock.
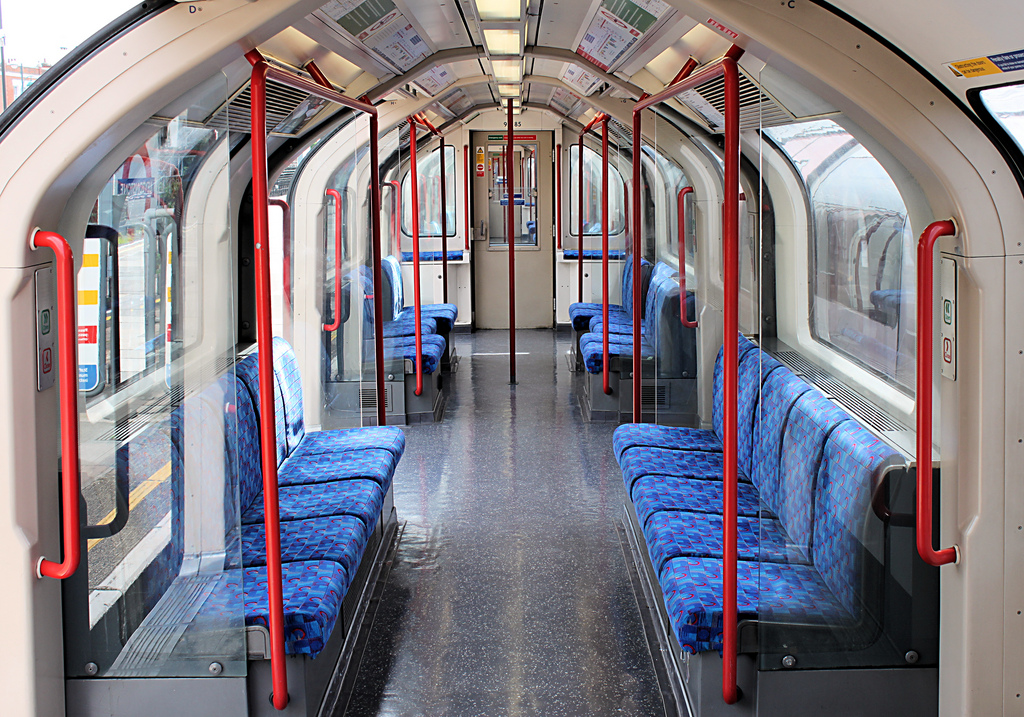
The interior reference I was using for the model. Image © bowroaduk
I blocked out the exterior two weeks ago and started on the interior this past week. I finished the modeling and set up basic UV's to apply the materials I made today in Substance Designer. The UV's aren't perfect by any stretch, but they're only placeholders.

Material test rendered in Marmoset Toolbag
This week will be blocking out the subway station environment in UE4 and start blocking out props. I'll have WIPs up on Sunday.
This Month in Review: VFX

My classes for this month were VFX and TPS (Texture Painting and sculpting). Both classes presented their own unique challenges and I want to talk about them, along with the things I learned.
I did three projects in VFX: one on rigid bodies, one on particles, and one on soft bodies.
For our first project, we were given a pre-modeled scene containing various objects for us to use to create our physics. It was then up to us to convert the geometry to Active and Passive rigid bodies, depending on the object, and edit the attributes to get the objects to collide and move in a physically-accurate way.
One big problem I had was that most of the simulation lacked weight. The logical solution was to increase the mass, but that made it very difficult to continue the transfer of movement from object to object. Instead, I used volumetric gravity fields to help the objects along. The result was motion that gave the illusion of weight and proper physics.
For our second project, we were given a pre-modeled and pre-textured warehouse scene to use as a backdrop for our particles. I chose to create my own scene, as the provided scene didn't facilitate the vision I had in mind. We were required to create three different distinct particle effects. I chose smoke, sparks, and snow.
Initially, all of my problems stemmed from me switching to Maya 2016 (which completely re-arranges the dynamics menus). After finding out where everything had been moved, the only issues I encountered were from a lack of understanding on how particle rendering worked. Once I figured out particle shaders and hardware rendering, the rest of the project went off without a hitch.
For our final project, we were required to make one soft body and cache the animation. I chose to create a teardrop and animate the weights to make it move between goals that I made. This made it look like a teardrop moving down the face.
For the head, I took Soap Mactavish's head model from Call of Duty: Modern Warfare 2 and modified the topology, mesh, and texture. I then rigged it and made a few simple blend shapes for facial movement. Finally, I did some simple animation to keep the head and eyes in constant motion.
The biggest challenge I faced with this project was keeping the teardrop soft body in motion as it moved between goals. It took a lot of trial and error to figure out how to keep the animation from stopping. The solution ended up being lots of overlapping weights.
In Review:
I've learned a lot this month and really enjoyed working with particles. I've also learned some things not related to VFX (how to create blend shapes) that will be very helpful in the future. Overall, a good month.

About Me:
My name is Logan and I'm a Technical Artist with 9 years of experience in UI implementation, Blueprint programing, 3D modeling, level assembly and lighting. I’ve been using Unreal Engine 4 (and now 5) since release and intend to keep using it for as long as possible.